How I edit my Photos (badly):
My Post-Processing Workflow: Part One
Editing can seem like a daunting task, and I’ll admit, I often find myself questioning my ability to get it right. Post-processing feels like a mix of art and science, and there are moments when I wonder if my edits truly capture the vision I had when I took the shot. But over time, I’ve learned that editing isn’t about achieving perfection—it’s about experimenting, refining, and finding your own style.
In this blog, I’ll share how I edit my photos, step by step, starting in Camera Raw and finishing in Photoshop. This is the approach I use right now, but like any creative process, it’s constantly evolving as I learn new techniques and refine my skills.
Step 1: Load and Prepare the Image
I begin by loading my photo into Photoshop, which opens the file in Camera Raw. This is where I make the foundational edits to ensure the image is properly balanced and composed.
The first task is to straighten the image, particularly for landscapes where a wonky horizon can distract from the scene. If cropping is necessary to improve the composition, I’ll do that here too.

There was a lot of empty space, top and bottom in this image so I went with a 16x9 crop and centered the ship in the frame, fortunately the horizon was already straight.
.
Step 2: Adjust Overall Exposure and Colour
With the composition set, I move on to tweaking the overall exposure, white balance, highlights, and shadows. This step is all about balancing the light and tones to create a solid base for the rest of the editing.

This photo didn’t really need too much work at this stage, the frame was softly lit and my in camera exposure was more or less where I want it, all i’ve done here this time is slightly raise the shadows.
Step 3: Edit the Sky
If the sky needs special attention—a common scenario for landscapes—I’ll use the Select Sky tool in Camera Raw. This allows me to adjust the exposure, highlights, shadows, and white balance separately, ensuring the sky complements the rest of the image.

Probably not the right image to show my process as not much editing was required but normally for the sky I would increase the contrast and play around with the highlights and shadows to make the sky more punchy.
Step 4: Refine the Main Subject
Next, I focus on the main subject of the image. Using the Select Subject tool, I’ll slightly increase the exposure and, if needed, boost clarity or sharpness to draw the viewer’s eye to the focal point.
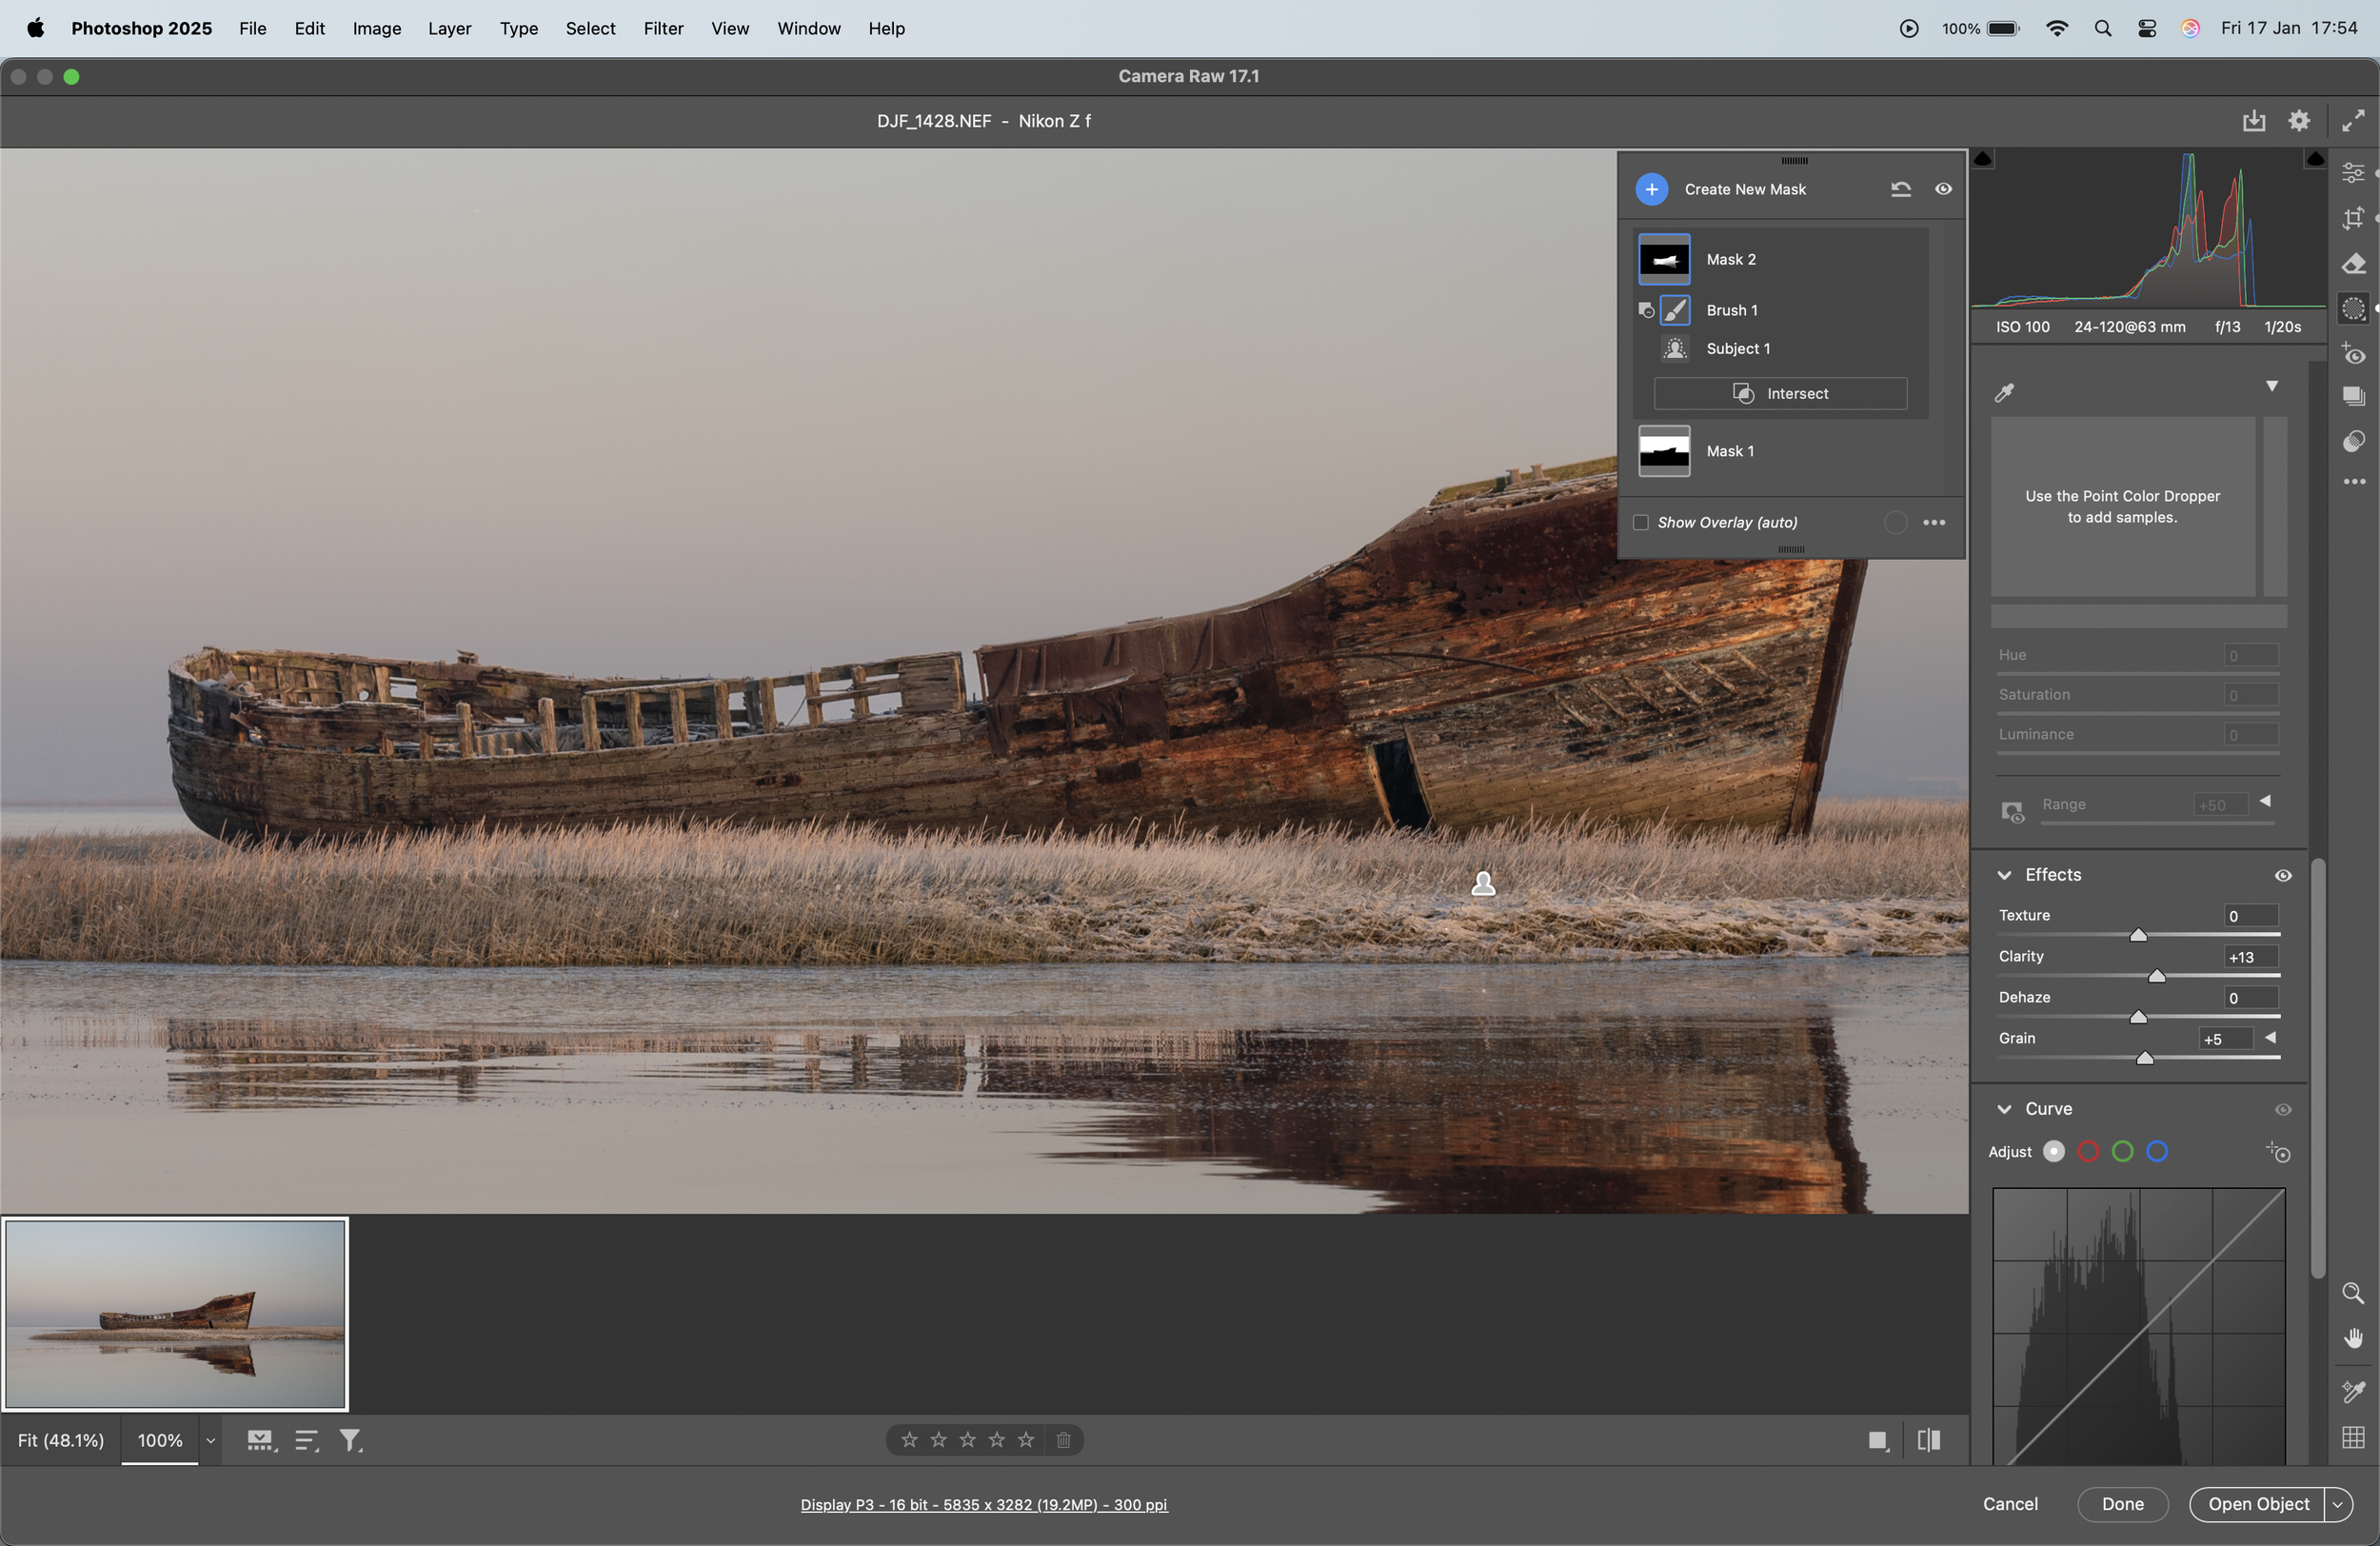
Photoshop/Camera raw is really clever now at selecting your subject, I user a mask here on the ship to increase the clarity and sharpness slightly, to make it pop abit more.
My Post-Processing Workflow: Part Two
In the first part of my editing process, I shared how I build a solid foundation using Adobe Camera Raw. Now, I’ll walk you through the final touches I make in Photoshop to give my images a polished, personal look. These steps involve enhancing saturation, refining contrast, and adding subtle tones to the shadows.
Step 1: Adjust Saturation
To boost the image’s saturation, I start by creating a copy of the image and navigating to Filter > HSL > HSB. This creates an HSL version of the image, which gives me more control over the colours.

Make it stand out
Whatever it is, the way you tell your story online can make all the difference.
From here, I switch to the Channels tab and holding command I select the green channel. With the selection active, I return to the Layers tab and create a new Hue/Saturation adjustment layer. This lets me adjust the saturation slider selectively, ensuring the colours pop without looking overdone.

I tend not to do too much colour grading in my images preferring to just bring out what’s in the image rather than completing changing the feel, I think this makes for more natural feeling images that closer resemble the conditions when the photo was taken
Step 2: Refine Contrast with Curves
The next step is all about contrast. I add a Curves adjustment layer, and, to keep things simple, I use the Linear Contrast preset most of the time. After applying the preset, I adjust the layer’s opacity until the contrast feels just right for the image. This quick method is effective and saves time while achieving a balanced look.

Subtle amount of contrast added to the image
Step 3: Add Subtle Tones with a Gradient Map
The final step in my workflow is adding a touch of colour to the shadows. I create a Gradient Map adjustment layer, which defaults to black and white. I then change the black to a navy blue and reduce the layer’s opacity to around 5–10%.
This subtle blue tone isn’t always necessary—it depends on the image—but I often find it adds depth and mood to the shadows without overpowering the scene.

This part of the processing is sometimes left out depending on how I feel it changes the image
Wrapping Up
Once these three steps are complete, my editing process is usually done. This combination of targeted saturation, refined contrast, and optional tonal adjustments helps me create images that feel natural and
If you’re curious about experimenting with these techniques or have any questions about the process, feel free to share your thoughts in the comments!

Final processed image.